Showing posts with label Cameo. Show all posts

Friday, December 25, 2015

Trendy Twine - Christmas Day Post

Good Morning and I want to wish everyone a VERY MERRY CHRISTMAS!!!!  


The Trendy Twine Design Team would like to share our very best Christmas Wishes with you today by sharing some Christmas projects, so head over to the Trendy Twine Blog to see what they have created for you!

Here is a look at mine!
I started off with this cute reindeer box that I found at the Silhouette Store and cut it with my Cameo. I cut the reindeer, added some amazing Candy Candy Trendy Twine to the front of the antlers.  I added a cute gingham bow then layered a triple Candy Candy Trendy Twine on top embellished further with a green button. I filled it with some Hershey Kisses.

I hope you enjoyed my project and I want to again wish you a VERY MERRY CHRISTMAS! 

Annie's Paper Boutique Candy Cane Trendy Twine 
Candy Cane - Red, Green, White - Christmas Bakers Twine

Wednesday, December 9, 2015

Snowman tag

Hello Friends!

I have been invited to an ornament exchange tomorrow, so here is the cute tag I made to go outside the gift bag. I think it turned out pretty cute.:) I do love snowmen! 
 I just felt like he was saying "Rejoice" with his little stick arms! :)
The Tag and Snowman are Silhouette files.  My papers are pieces leftovers from DCWV Christmas stack. The snowflakes are from My Creative Time. The sentiment is from Paper Smooches.
I added some crinkled seam binding to the top and the amazing Candy Cane Trendy Twine (on sale) by the way which is embellished with a green button.

I am joining along at The Paper Players: Let it Snow

Amusing Challenge - Let It Snow, Silhouette Challenges - Anything Goes, D.L. Art - Christmas, Doubleclick Skittles Challenge - Snowman (Thanks Julie)

Thanks for visiting me! Hope you have a wonderful Wednesday!
~Tammy~

Monday, December 7, 2015

Be Jolly - {The Kraft Journal}

Good day to you!

This week at The Kraft Journal, we have a Santa or Snowman challenge.  I chose to design a card with Santa on it. 

I started with a card base of Brown Kraft Cover weight cardstock onto which I added a piece of patterned paper that was still on my desk leftover from a previous Kraft Journal project. I took a white doily and cut it in half adding it to the bottom and top of the card front where I stamped Be Jolly (Paper Smooches) in black ink on the bottom portion. 

I used my Silhouette Cameo to cut out a Santa from white, blush, red, and Blackboard Stock Paper. After I assembled him, I popped him on the card front using foam adhesive for added dimension.

Please be sure to head over to the The Kraft Journal to check out the projects by the other talented ladies.  We hope to see your Santa or Snowman creations in the gallery this week for your chance to be featured on our "Feature me Friday" post as well as be entered to win a $15.00 gift voucher from The Kraft Outlet Store.

 
I'm joining in at D.L. Art - Christmas Theme and Silhouette Challenges - Anything Goes.
 
Have a fantastic start to your week!
~Tammy~

Wednesday, November 25, 2015

Basketball - Thanks

Hello friends,

I am sure most of you are starting to get busy with your Thanksgiving preparations. 

Today, I have a quick CAS card to share with you. Yes, this girl made a CAS card that took me under 15 minutes to make (and part of that was travel time to the basement where my Cameo is housed).

My son recently had a birthday, and on his actual birthday he and a buddy went to a Washington Wizards basketball game. These two played basketball together last year, so naturally, he wanted me to make his friend a basketball card to thank him for going with him and for the gift he received.

I started with a Brown Kraft Cover Weight cardstock base which is not visually seen from the front. I covered the Kraft base with patterned paper from Cosmo Cricket that I have had FOREVER! Digging into my leftover scraps, I found a piece of solid green cardstock (pulling the green from the patterned paper) and added to the center. I die-cut the word thanks in black from a My Creative Time set. 

Next, my trip to the basement to cut the basketball out using my Cameo. I have a very thin left over piece of Orange Cardstock and I added that to give a border on the green cardstock (want not waste not). I added the basketball to the center adding the sentiment just below to complete this very simple card.

Hopefully his friend will like it and remember their special time to their first NBA game.  Here is a picture of the boys and their basketball coach watching the game intently.  
 
I am sharing at Amusing Challenge - Thanks.

A little humor before I sign off.


I hope you all have a wonderful Wednesday! 
~Tammy~

Thursday, October 29, 2015

Baseball Player Birthday Card {Day 2}

Hello~

{Happy and Honored to have this card selected as a Design Team Pick at Can You Case It on 10/31/15} 

Yesterday I shared a baseball birthday card, and I am back with another today. My son has three teammates who are having birthdays soon (and my son will also be in that mix in a couple of weeks), so I am trying to crank out a few to have ready. My poor boy usually gets left out of the mix because his Mama runs out of time to make a card for him. I am going to make an effort this year to make him one. Although, I think last year I was successful! :-)
I started with a Brown Kraft Coverweight card base. I cut a scallop frame using my Silhouette Cameo from textured Navy cardstock. The baseball is also a file from the Silhouette Store.  I die-cut and stamped the bats and crossed them in the center of the scalloped Square adding the baseball to the center.
I stamped the sentiment on a banner that was die-cut and added it to the lower left  of the card. It came together pretty fast! I stuck to the colors again of my son's travel team.

I used the sketch at Can You Case It for inspiration. I took some slight creative liberties! :-))))
CYCI#92

I am also joining in at Pink and Main - Birthday.
 

Thank you so much for popping by today! 
~Tammy~ 

Saturday, March 28, 2015

Easter Marshmallow Bark {Trendy Twine}

Hello Friends!

I hope you are enjoying yourselves this last Saturday in March. I have a full day schedule. I feel like I live in my car more than I live in my house. 

I have a project today I am sharing on the Trendy Twine Blog using some fabulous Watermelon Taffy Twine and Small Candy Treat Sacks! I love these treat sacks because they have flat bottoms. Click here to see a project I made with them for Christmas gifts. They are perfect for a small candle. 

I made some Easter Marshmallow Bark and packaged it inside the Small Candy Treat Sacks. I used my cameo to cut a 3D Treat Bag Holder to attach the packaged Easter Marshmallow Bark to. Since I had the cutting machine going, I cut an Eater Egg with the same coordinating paper as the liner. I topped off with a few sequins and of course Watermelon Taffy Twine .

Sorry for the glare from my craft room lights. I promise you this bark is delish! So fun to make too!
Trendy Twine Products
Watermelon Taffy Trendy Twine - Lime, White, & Pink Bakers Twine

Only a few days left to snag this awesome Watermelon Taffy Twine at a reduced price. Think how darling it will be used on your summer projects.

Thank you for stopping by! 
~Tammy~

Monday, March 23, 2015

Easter Treats with The Kraft Journal

Hello~

It's Monday and that means I am kicking off a new challenge at The Kraft Journal for the week. Hope you will join in the fun! :-)))) This week we want to see your CAS - Easter/Passover creations. 

I created a tag to to go on some treats which I included to go in a care package. For the tag, I started with a base of Brown Kraft cardstock onto which I added some pretty spring patterned paper. I stamped a Happy Easter sentiment on a banner and added it just below the cute little rabbit which was cut using my cameo.  Butter Hand Stained Bias Tape was used to tie the tags to the treats.  

For the treats, I created the treat holder from Brown Kraft cardstock. Next I wrapped Hershey Nuggets with patterned paper and placed them in the tray that was created. Using a pretzel holder treat bag, I added the prepared tray and tied off with the Butter Hand Stained Bias Tape.  I added a double bow and button laced with Light Blue Pastel Hemp Cord. 

We hope to see your CAS - Easter/Passover creations in the gallery this week for your chance to be showcased in the "Feature me Friday" post as well as be entered to win a $15.00 gift voucher to The Kraft Outlet store.

Thank you for taking a peek.
~Tammy~

Monday, February 16, 2015

Let's Celebrate Mardi Gras

Monday Greetings!

We have an "Anything Goes - Celebrations" challenge this week (Ground Hog Day, Mardi Gras, President's Day) at The Kraft Journal. With Mardi Gras tomorrow, I was inspired to create a project for the occasion. Hope you enjoy and will be inspired to enjoy us this week!
I started by creating a card base from Blackboard Stock Paper. I topped it with a postage stamp die-cut to frame the mask I cut using a file I obtained at the Silhouette Store.  I added a sentiment from My Creative time Let's Celebrate stamp set below in black ink. At the top of the card, I wrapped a length beautiful lavender Pastel Hemp Cord and tied in a bow at the right side of the card.  Sequins were randomly placed to finish my card.
I wanted a complimenting treat bag, and I used the Small Kraft Coffee Bag with window which I filled with lots of Mardi Gras goodies. I decided to alternate my mask colors for fun!
Please be sure to head over to The Kraft Journal blog to see the projects created by the other talented ladies.  We hope to see your Anything Goes - Celebrations creations in the gallery this week for your chance to be showcased in the "Feature me Friday" post as well as be entered to win a $15.00 gift voucher to The Kraft Outlet store.

Thank you for stopping by! I hope you have a GREAT start to your week! 
~Tammy~

Saturday, February 14, 2015

Valentine Secret Cupid - {Trendy Twine}

The Trendy Twine design team did something a little different this year for Valentine's Day -- Secret Cupid.  Names were assigned to us and no one knew who had who.  We designed a card or tag and sent along a little treat to our assigned DT sister to make her Valentine's Day a bit more happy.  Today we are sharing our projects with you.

I had so much fun doing this for one of my Design Team Sisters. I hope you like my Valentine Gift Set~
I started with a red cardstock base and added an embossed layer of kraft cardstock. Next I added a few tickets to the bottom and then a length of Cherry Cupcake Trendy Twine was wrapped around three times and tied in a bow.  In the center of the card, I layered a double heart that was cut using my cameo. I then layered this onto a red heart doily. A few sequins were added for a touch of glam. A red and white seam binding bow was tied and added in the lower right of the heart embellished with Cherry Cupcake Trendy Twine  bow, button, as well as a tag stamped With Love from DeNami Designs.  
Next moving on to the tumbler.
Using my cameo, I used the same heart file from my card on the tumbler. I personalized this for Sukie by adding her name below the heart. I filled it with some yummy Hershey Kisses and a gift card.  Lastly, I tied a pink ribbon bow around the straw and topped it with another bow made of more awesome Cherry Cupcake Trendy Twine.

So there is my Secret Cupid gift revealed. I hope you have enjoyed and like it as well.  Make sure you head over to the Trendy Twine blog to see the other Secret Cupid projects by these talented ladies! I know I am thrilled with my Secret Cupid Gift I received. Thank You Kimberly for making my day! I loved my gift! I have to say I am truly blessed to be on such an amazing and caring team. 

I am also going to share at Cardz TV- Ribbon, The Pink Elephant - Be My Valentine, Paper Issues - Perfect Pairing, Jo's Scrap Shack - Valentine.

Thanks you for stopping by and have a wonderful Valentine's Day!
~Tammy~

Thursday, December 18, 2014

Deck Those Hall Treats

Hi There!

Just popping in to share a few more nugget treats that have already been sent on their Merry way. Hopefully they have been enjoyed and brought a yummy smile!
The tags were cut using a file from the Silhouette Store as well as the nugget holder.
Stamps are from Waltzingmouse Stamps: Sewing Box Christmas and Vintage Ornaments.
Of course I used some awesome Holly Berry Trendy Twine.
I hope you are enjoying your holiday preparations!
Sharing at:
Silhouette Challenge - Anything Goes
Craftin Desert Divas - Christmas
Paper Issues - Making It Merry

Have a wonderful day!
~Tammy~

Monday, December 15, 2014

TKJ#202 Color Challenge - Christmas Wreath

Hello Friends~

Boy we sure are winding down and getting closer and closer to the big day! 10 days to be exact! Whew! Are y'all ready?  

We have an inspiration photo with color challenge for you this week at The Kraft Journal.  Since it's such a busy time of the year, I kept my card fairly simply letting my electronic cutting machine do most of the work. Also makes it flat for mailing.

As previously stated in other post, I am leaving sentiments off the front so that I can have the option to use as a Thank You note after the holidays. I always need those, and when all the gifts are put away and decorations are down, it usually takes me awhile to get motivated again and find my mojo. This makes it easier on me in a few weeks having these cards complete, and all I have to do is write a note of thanks inside and send it on it's way. 

Sorry for the dark photos...rainy dark day
I started with a base of Brown Kraft cardstock which I added an embossed layer of Buff Ivory cardstock.  Next I created two pennant banners and layered them on top of the other.  I used a sprig from DeNami Design Classic Christmas Stamp Set to create a random background on my top layer for a little more visual interest.
As mentioned, I used a file that I purchased from the Silhouette Store to cut my wreath.

Have a look at the inspiration photo provided by The Kraft Journal.

Please be sure to head over to the The Kraft Journal to check out the projects by the other talented ladies.  We hope to see your "color challenge" creations in the gallery this week for your chance to be featured on our "Feature me Friday" post as well as be entered to win a $15.00 gift voucher from The Kraft Outlet store.

I am also sharing at Craftin' Desert Divas - Christmas Linky Party, Pumpkin Spice - Freebie Friday, Silhouette Challenge - Anything Goes.

Have a Fantastic week!
~Tammy~

Monday, December 8, 2014

Joy Christmas Treats

Good Morning Friends!

I thought I would share some treats I created to go in a care package. The picture is not great because I was in a race against time to get them finished and in the mail because they are traveling pretty far.  I am hoping they reach their destination before Christmas. So, I apologize as  I just snapped the picture quickly not fussing with presentation! :-) 

I have more of these to make, so I am sure you will be seeing the same thing maybe using different papers, tags and images in a few days. (If time works on my side that is). Every year I think I am going to get a jump start and I never seem to get all the task I want completed. 

I actually made 4 of these for the care package. (Sadly, the group shot didn't turn out and they are already on their merry way) I used a tray I found in the Silhouette Store which made this project so much quicker to complete. I made them by hand in the past.  The tag is also a file I have from the Silhouette Store. The snowman and sentiment are both from Paper Smooches.  Perfect embellishing touch is Trendy Twine Holly Berry twine  (Which is on sale right now).

I am going to share at: Decorate To Celebrate - Anything Goes, Craftin Desert Divas - Christmas,   DL Art - Any Winter Holiday, Paper Smooches Sparks - Anything Goes, Pause Dream, Enjoy - Christmas, Silhouette Challenge - Anything Goes, Pumpkin Spice - Anything Holiday

Thank you for stopping by and having a peek.
~Tammy~

Tuesday, November 18, 2014

Thank you~

Hi~


Well, I have been deep in mass producing Thank You cards for my son. His birthday was on the 10th and he had a birthday party on Sunday with his travel ball teammates as well as a few others he has met through other baseball teams he has been on.  So it only seemed appropriate to make a simple baseball thank you card.  It's pretty much all the boy talks and reads about even in the off season.

The key to mass producing is quick and simple in design. I was also determined to use up some scraps. Other than the card base, everything else was from my leftover pile. Yay...still no dent was made. Boo!

Here is one of many and the rest are still in "production" as I type this.
 I started with a Blackboard Card base, and added my patterned paper onto a panel of Brown Kraft Cardstock.  I used the same Kraft to cut out the Thank You from My Creative Time.  The baseball is one that is in my files from the Silhouette Store. 
It's a work in progress that I hope is complete by the time this goes live! :-)
Nice and flat for mailing! 

This is the month for giving thanks, my son has a lot to be grateful for...friends and family that are far who could not be here yet showered him with gifts, a wonderful baseball team that makes him feel like family, and the opportunity do what he loves 9 months out of the year!

I know you see a lot of baseball cards on here, but it's our love!  I love that I have the opportunity to make something special for all those in our son's life that share the same passion. It's why we do what we do. Right now we are missing it! If you missed yesterday's post, click here. I actually share some "personal" photos. My son got to meet  a Pro baseball player.  A day we will always remember!

Thank you for letting me share what I am working on!  Many of you know I have been struggling with balance lately! Still working on that and finding my mojo!

I am sharing at: Simply Create Too: Thank You, The Sisterhood of Crafters: Thank-ful, Word Art Wednesday - Anything Goes

Have a Terrific Tuesday~
~Tammy~

Saturday, November 15, 2014

Fall Treats Gift Basket {Trendy Twine}

Good Saturday Morning! 


I have a little Fall gift basket to share with you this morning that I made for the Trendy Twine Blog featuring some awesome Orange Truffle Trendy Twine.

I put together a little gift basket that has some yummy apple butter that I picked up at a local pumpkin patch. I added a piece of fall patterned paper to the top to dress it up and wrapped a piece of Orange Truffle Trendy Twine before placing it in my basket surrounded by yummy Hershey Kisses and Rolos. I also added a cute orange pumpkin scrubby behind the jar. 
For the bag topper, I die-cut a large label using one of my Spellbinders dies from patterned paper.  The turkey is from a file in the Silhouette Store. I gave Mr. Turkey a little twine bow. :-) Rather than use the face that came with the file, I used a face from Peachy Keen Stamps Critter Faces. Sometimes it's just faster to stamp a face than paper piece. :-)
The pumpkins, Sign and Sentiment are all from Jaded Blossom. As you can see, that sign is just adorbs trimmed in that awesome Orange Truffle Trendy Twine.

Thanksgiving Orange Truffle Trendy Twine - Orange & Brown

Why don't you check out our current Fall Foliage Challenge and play along with us. You can read about it here.  It's an awesome way to win some more Trendy Twine! Yay! Now who doesn't want that???

Check out the other places where we share our projects .....

Trendy Twine Blog- HERE

and the
Trendy Twine Facebook page- HERE
Don't forget to visit the
Store - HERE

I am also sharing at Die Cuttin' Divas - Let's Talk Turkey, Allsorts Challenge - Anything But A Card, Jaded Blossom - Thankful, Decorate to Celebrate - Anything Goes

Thanks so much for stopping by.
I hope you have enjoyed my project and have a Super Fall  Saturday!
~Tammy~

Friday, November 7, 2014

Wanna Sketch All Star Birthday

Hello Friends~

Well, my little guy needed a birthday card for a friend...his poor mama is seriously struggling creatively.  Not sure I am happy with the end result.  Normally, paper crafting is my therapy, but right now, I am just in a place where that isn't even helping, but I know I'll get there....just need some time. 

I feel sad for my little man. His birthday is Monday, and I am not sure his own mama will be able to get a chance to make him a card. Pretty sad. Actually, he doesn't really care as long as his friends have cards. 

Now, I know you didn't come here for this gloom and doom, but it explains my lack of posting and blog hopping lately. I am not normally in a funk, but I have good reason, and a lot on my plate on top of it all, but it all works out and will all fall into place. Just have to find my new balance. :-)

Here is my card...I had some input from the short stack. He requested three different shades of blue for the stamped numbers. I used Chipped Sapphire distress ink for the Navy, and I wasn't happy at first, but I think it's growing on me.

I started with a Brown Kraft Cardstock onto which I added my patterned paper.  I took a strip of navy cardstock and added to the lower  portion of the card front topping with a star die-cut border.  Next I added the stamped background adding a die-cut baseball player which was cut using my cameo from a file purchased in the Silhouette store. To add dimension, I cut the image first using chipboard and then cardstock and layered them together. I added a star to the player's helmet using leftovers from the border.
I stamped the sentiment from PTI - 7th Inning Stretch onto a banner, and added it to the upper right corner of the focal piece. Lastly a few sequins and a leftover star was added to complete the card.

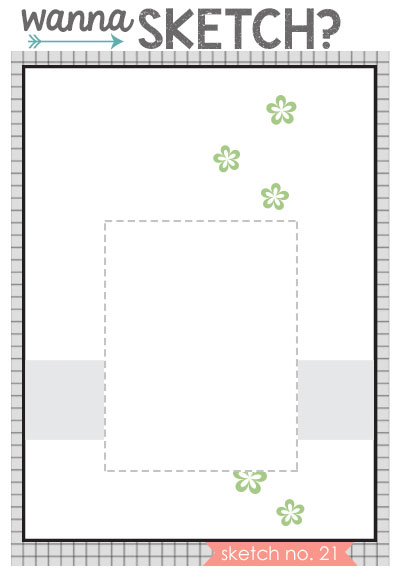
Inspiration was found at: Wanna Sketch #21.

DDWS21
Thanks for putting up with me today and stopping by! :-)
~Tammy~

Tuesday, September 9, 2014

Apple Gable Box

Hey friends,

Last week, I shared a sneak peek with you for a project I created on the Trendy Twine blog. I really hope you check it out, but if you missed it...I thought I would share it again and give you the full reveal.

Here is my project:
This Gable box was made from red cardstock from a file that was purchased from the Silhouette Online Store. I wrapped the box with the Cranberry Trendy Twine as well as outline the apple for a decorative touch. Lastly I added a multi-loop bow to the center to complete the project. All that was left was to fill the inside with a few herbal tea bags.
Cranberry Trendy Twine - Red & White Bakers Twine

Click here to shop for this fabulous twine and see all the other amazing products in the store.
Click here to follow Trendy Twine on Facebook.

I would also like to share at Cupcake Inspirations - Apple for your teacher.
~Tammy~