I am going to keep this post short today...busy busy start to the week...not raining yet, but still dark dark dark. Yuck! (I mean look how dark the backdrop is to my photo it is like yuck out there)
Well, As you will see from my make I was in a Country Bumpkin kinda summertime mood! :-)
I already knew I wanted to use my black and white gingham checked patterned paper that was in my stash to go with some sweet red strawberries (Wilson Designs Strawberry Lemonade), so I pulled out my paisley Cuttlebug embossing folder and performed the letterpress technique for a fun bandana like background and Viola our sweet little country summertime greeting came to be.
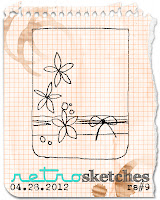
The layout inspiration comes from Retrosketches. Being Me...I changed the flow a bit! :-)
The Kraft Journal's Challenge this week is to use any sketch - Well that was an easy one! :-)))
We are still wet as ever! I guess that is good for our spring gardens, but I run on solar power, so I am missing Mr. Sunshine, and so does my camera! Ahhh.....
I started by piecing together my patterned papers and adhered it to my card base. A length of aqua ric rac ribbon was applied where the two patterns meet. At the top of the card face, I applied some beautiful off-white crochet trim.
A Spellbinders Labels 1 die was cut and and created into a tag using stamps from Waltzingmouse Vintage Labels 1 and sentiment from Say it Loud. I embellished the top of the tag with some pearls I had on my desk from another recent make adding a punched butterfly to the lower left of the tag adding a pearl to the center. For a finishing touch, two crochet mats were applied near the lower right of the tag embellishing with some vintage buttons I recently won atZeus and Zoe.
I have a card to share with you all today that was fun putting together a mix of things I had on my desk. I love doing this from time to time to see what I come up! The only thing I had to reach for were my pearls and stick pins.
I started this card with some patterned paper that was just looking to either be used or put away. It was on my desk leftover from another make. I then took a length of sheer ribbon and wrapped the middle of the patterned paper and tied in a fussy bow embellishing with a rose that I touched the edges with Dusty Concord distress inks and some stick pins.
A hand dyed doily was added to the center. Followed by the making of my focal image. I started with a Crafty Secrets Greetings and Sentiment cardstock sticker and added to my trimmed burlap wrapping some twine vertically and horizontally a couple of times. This image seems perfect for spring.
A birdcagewas stamped, cut and added to the focal image adding two birds from the Crafty Secret sticker cardstock. A sentiment ticket tab was added to the upper right corner and finishing touches include buttons and a pearl to the top of the bird cage as well as distressing the edges with tea stain.
Brace yourselves because I am back with another Christmas Card! That is Two in one week, so that makes three done! Yipee!
Still having dreadful weather, so dreadful pictures sorry!
I started this card with a piece of beautiful patterned paper that was from the LUSH collection and added it to my rustic cream cardstock. It has a velour texture. YUMMY! I took a length of satin ribbon and wrapped the card vertically down the center embellishing with two beautiful red roses at the top and bottom of the card front.
I created the ornament by making my chipboard using a Trader Joe's Cracker Box.
After I painted it.
I love to use my paper sander to distress the edges for an antique look.
After it dried I used Cherry Cobbler Ink to stamp an ornament from Waltzingmouse Vintage Ornamentsto the painted chipboard and as the ink soaked into the paint it gave it a more faded antique look. A prima glittered rose was added to the center along with three gold leaves that were cut from some May Arts Ribbon. A Tim Holtz Memory Pin was added to hold my stamped sentiment which is also from the Waltzingmouse Vintage Ornamentscollection.
I hope that you have a wonderful start to your weekend!
~Tammy~
{Recipe}
Stamps: Waltzingmouse stamps: Vintage Ornaments
Paper: CS: PTI, PP: MME
Ink: Stampin' UP! Cherry Cobbler Other: Dies: Spellbinders, Ribbon: American Crafts, Roses: Prima and Michael's, Leaves: May Arts Ribbon, Memory Pin: Tim Holtz
First let me just say that this on and off rain/cloudy weather we are having is not making picture taking fun! :-) We need the rain, but if it could kindly do this at night I would appreciate it! :-))))) Thank you Mother Nature! Oh well.....
I have a Thinking of You card to share today.
I started with a Dark Gray cardstock base (Stampin' UP!) I pieced my two patterned papers together both found in my very much talked about and ever growing stash pile. A length of crochet trim was added to the upper quarter where the two patterned papers met.
A large scalloped square was die-cut from Whisper White cardstock to create a base for my focal images. The stamps I used are from The Crafts Meow Telegram. I die-cut a heart from burlap and applied to the center of my scalloped square embellishing with some beautiful flowers and die-cut leaves from the coordinating lavender checked, gingham paper. Some shreds of curly paper were added below the leaves which I was inspired by the photo from Color Combos Galore Inspirational Picture which you will find below. These are paper shreds from past paper trimmings that I knew would could in handy one day! :-)
I was inspired by the following~
Colors and photo atColor Combos Galore:lt lavender - lt blue - dk gray - lt gray
I have a quick share today~ I am joining in a couple of Christmas Challenges, so this marks number 2 complete. :-) Woo hoo!
The layout came from Lesley's Merry Monday Challenge. Her sketch designs make it easy to crank out a card quickly, and that is important if you are mass producing Christmas cards. I just dug through my Christmas stamps and my stash of papers and before I knew it I was done. My creative time is limited, so I appreciated the CAS design to finish quickly, but yet I felt like I accomplished checking the box and getting started in my Christmas cards.
So here it is....
I started with Riding Hood Red as my card base to match the patterned paper I found in my ever growing stash pile. (I believe this pp is from the Christmas Stack from DCWV).
I stamped three ornaments from Stampin' UP! Delightful Decorations and used the coordinating ornament punch. I added Martha Stewart Holiday Snow glitter to the middle polka-dot ornament. :-) I stamped the Merry Christmas sentiment from Wilson Designs Snowy Wisheswhich was hand-cut into a banner and applied to the left side of my patterned paper panel.
That's about it! Short sweet and to the point. :-)
Hoping to see some sun after days of wet cold rain. I have a little french country birthday card to share with you today!
I started this card by stamping a background pattern from Walzingmouse set calledFrench Country in Crushed Curry ink. It's so pretty! Next I added a scalloped border die-cut in navy blue to the top portion of the stamped background. Next I stamped a border from French Country in Tim Holtz Distress Ink Chipped Sapphire was trimmed and applied to the center of my background panel. The sentiment Bonne Fete was stamped in Chipped Sapphire to the lower right corner of the panel.
With Whisper White cardstock, I die-cut a Labels 18 die that coordinates nicely with Waltzingmouse Vintage Labels 18which was stamped in the Chipped Sapphire. To the center of the focal die-cut Mr. Rooster was added using Crushed Curry.
**Woohoo, this birthday wishes card was chosen as THE WINNER for the City Crafters Blog. Thank you!**
I want to thank everyone for their kind words on my post yesterday. It was hard on my husband and the others from here that served with the crew in Hawaii.
On a happier note, I have a quick little card to share.
I started this card by adding my patterned paper to my Whisper White cardstock and distressing the edges with tea stain ink. A doily was cut in half and added to the card front followed by a die cut circle from a vintage book was added to the upper right of the card front. I then die cut and stamped the roses in Cotton Candy ink adding them to the center of the doily and vintage book print garnishing with some sweet little pearls.
A length of grosgrain ribbon was wrapped around the middle of the card front and tied in a bow embellishing with a button, pearl and a birthday wishes sentiment tag all tied together with some twine. For a finishing touch, three pearls were added to the lower right corner.
Good Sunday Morning to you! (Or whatever time of the day it is in your part of the world)
**Woohoo This card was chosen as Stampendous April's Monthly Challenge Winner **
I started this card by adding some white paint to my kraft card base for a bit of a shabby touch. If you have visited me lately, then you know this has been a touch I like to add to my cards. I then pieced together my patterned papers and added them to my card base adding some aqua ric rac trim.
A trimming of burlap was cut and added to the left side of my card front. A tag was die cut and stamped using Waltzingmouse Chicken Wire. The sentiment was stamped in Versafine Vintage Sepia and comes from PTI's Green Thumb stamp set. A die cut fence was created using the same Cheerios' box from one of my previous projects seen here.
This makes the perfect chipboard
This is the recycled chipboard after it's been painted.
All that is left is to apply the fence to the tag and tie a fussy bow to the top and dress it up with some paper roses!
I found my inspiration for my card at The Shabby Tea Room : Beautiful Roses. I was inspired by the photo and we had to use AQUA, PINK, NEUTRALS and FLOWERS!
It's with a heavy heart that I am closing my post. As many of you know, I don't usually get too personal on my blog, but if I can steal a little bit more of your time to share something that has hit close to home after I had originally scheduled this to post.
As some of you know, my husband is a Black Hawk pilot in the Army. We recently moved from Hawaii after living there for 9 years. He deployed 3 times to a war zone for a year and sometimes longer. In most cases you are a single parent, (and I have the upmost respect for single parents) head of household trying to figure out those honey do things on your own, but you are daily living with the stress and concern for that dear one deployed. I can tell you an unexpected knock on the door can send chills up and down your body. As this post goes live, my husband is on his way to Dover, Delaware to meet the fallen soldiers who were killed in the Black Hawk crash in Afghanistan on Thursday. They were from our battalion in Hawaii. One of the crew members on board was a crew chief that worked with my husband. He was just 23 years old and as my husband put it " He would do anything for anybody and give the shirt off his back." He played around with my son and kept him entertained if we stopped by the hangar. He had his whole life ahead of him.
I guess my reason for sharing is many have got complacent and forget that we still have many deployed. In fact, I didn't see much coverage of this at all. Let us not forget our Men and Women in harms way and please do not let us forget and let's honor our fallen who sacrificed. This crew all had families and my heart goes out to them.
Below is a video that someone has brilliantly put together by Tim McGraw titled: "If You're Reading This" I never have a dry eye when watching it and I always get a chill when I hear the song on the radio.
Thanks for letting me share and remember hold those you love tight! Each day is precious!
I hope you have a wonderful rest of your weekend and beautiful week!
~Tammy~
{Recipe}
Stamps:Waltzingmouse: Chicken Wire, PTI: Green Thumb
I was recently emailed by Joanna Munster the owner of Inspired By Stamping if I would like to join her Design Team. I happily accepted and I am proud to be a new member of theInspired By Stampingteam. You can read Joanna's introduction post here.
Here is a card I created using Inspired By Stamping Sweet Aviary.
I started this card by piecing together my patterned papers and adhering to my kraft card base. I then added some beautiful pink trim across the upper portion of my card front. I then added two hand-cut banners to the upper right corner of the card front varying the lengths. A hand-dyed doily in Antique Linen was cut in half and added to the lower portion of my card face.
A heart was cut in kraft cardstock using the Cricut. This sweet littleAviary image was stamped, in Vintage Sepia in the center of the heart which has been distressed with tea stain ink and Antique Cream paint added. A small pink button was added to the cage as a decorative touch. A fussy seam binding bow tops the heart embellished with a button, some twine and a darling sentiment tag which was computer generated. The precious bird is also from Sweet Aviary.


")


