Showing posts with label Little Red Wagon. Show all posts

Monday, September 15, 2014

Grand Slam Birthday!

Good Monday Morning Friends! 

{I am honored that this card was Featured at Little Red Wagon on 9/16/14, and Top 3 Honors at Scrapbook Blessings Club on 9/21/14}

I thought I would pop on and share with you a card I made for my son to take to a birthday party this past weekend. It was for one of his baseball teammates. A new friend who shares the same love, so he asked if I would make him a baseball card. What's a Mom to do....make the boy a card! :-)

So you get the pleasure of seeing another baseball card, and I can assure you there will be plenty of assorts in the future on this ol' blog. At least I can say I am stretching my dollar with my sporting supplies! :-) 

Ok, on to the card! I used the sketch only over at Fusion. Since their color inspiration in the photo was shiny pink, I didn't think that would fly for this little baller! :-)
I started with An Almost Navy card base onto which I added my distressed hand stamped Kraft background panel. I dusted off an old Stampin' Up! set for the numbers. I used the stamping off technique to give the numbers an older faded look.
I cut a piece of cork into a banner and added to the card front. I die-cut and stamped the bat, glove, and ball all from Buff Ivory Cardstock adding them to the cork banner. I stamped a sentiment also on Buff Ivory Cardstock and cut into a banner placing it in the upper right corner of the card. Lastly, I used a piece of baseball ribbon to create a tab to tuck at the top left corner and further embellishing with a DeNami Design Sapphire Boutique Button laced with a piece of Natural Hemp Cord

Here is the challenge at Fusion.

I am also sharing at Little Red Wagon - Use Cork, Word Art Wednesday - Anything Goes, Little Scrap Pieces - Show It Off Saturday, Scrapbook Blessings Club - Anything Goes.

Thank you for stopping by and have a MARVELOUS Monday!
~Tammy~

Wednesday, November 28, 2012

The Kraft Journal - Lunch Bag Kraft Paper Christmas Tree Tutorial

I have a fun little project for The Kraft Journal to share making your very own paper Christmas Trees from Lunch Bag Kraft.

The supplies you need include:
Lunch Bag Kraft cardstock.
* Wooden Bobbin
* Dowel Rod
* Stamps to decorate
* Glitter
* Embellishments

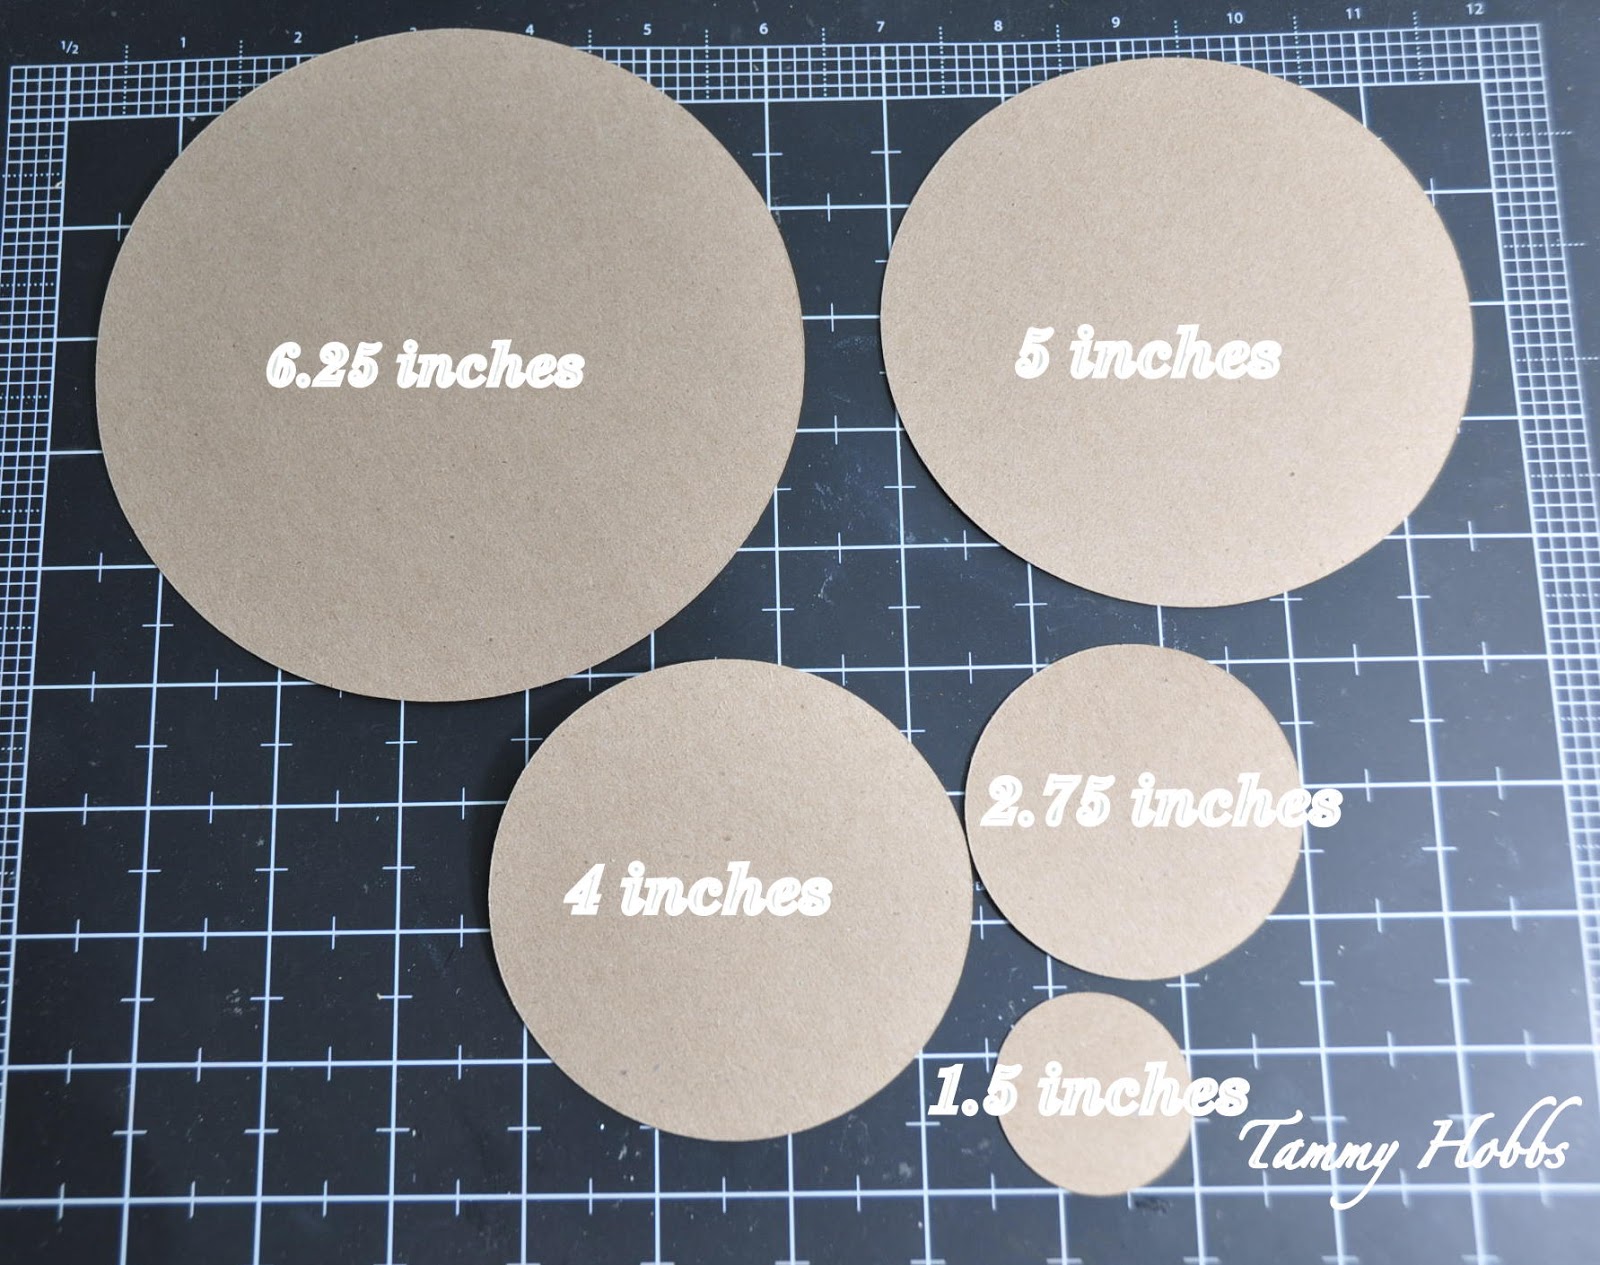
To start, you will need to cut some circles from Lunch Bag Kraft cardstock in the following sizes.
  • 6.25 inches
  • 5 inches
  • 4 inches
  • 2.75 inches
  • 1.5 inches

I used my Cricut, but you can utilize those resources in your house such as trace around bowls and cups. 
At this point, I stamped my circles randomly with some snowflake Images from DeNami Designs for a decorative touch.

Next I folded my circle in half.
Fold in Half Again.
And Again!
And one more time! :-)
Next you will need to snip the tip off.
The Next step (not pictured...lost my photographer) is to now open up your folded circles and fold accordion style.  

You will now repeat the process for the other circles.
Next you will place your dowel rod into your wooden bobbin and stack the folded circles.  For a touch of glitz, you may want to add a touch of glitter to the edges before stacking them.

Nottinghill Seam binding was added to the top; tied off in a fussy bow embellished with some jingle bells. 
A star was die-cut from C-Flute Corrugated Kraft Cardstock and painted for a shabby vintage look. 

Here's the finished tree. Fun and cute and easy to make. 

Be sure to stop by The Kraft Outlet to check out the wonderful line of Kraft Paper products! I would love it if you dropped by The Kraft Journal and left me some love! 

I am also joining in at Paper Issues - Happy Holidays, and thanks to Benzi...Little Red Wagon - Trim the Tree!

~Tammy~

Monday, August 27, 2012

Recycle It with a Pop of Green

Hello!

**Excited to note that this card was chosen at Little Red Wagon as one of the Featured Upcycle Projects on 8/28/12 Thank you ladies I am Honored and also made Honorable Mention Cup of Tea at The Shabby Tea Room on 9/2/12**

I have a quick share with you today that is all about recycling! Everything on this card was created from my scrap stash including the card base. There are also some repurposed elements as well.
I started with an embossed background leftover from another make. I used the letterpress technique to add the pop of green to the embossed impression. I took the embossed pattern and distressed the edges and curled some corners to give it a worn look. I had a scrap of floral patterned paper laying on my desk and it was the perfect size to add to the center of my card. A length of lace trim and white pom pom's were added to the top and bottom of the floral patterned paper followed by some green baker's twine which was wrapped horizontally around the card front, tied off in a bow and embellished with a pearl. 
As I was cleaning out my closet I realized I had an empty box from my flat iron. (Don't ask me why I had this in my closet still???) As I was headed to the recycle bin, I had an idea to use the corrugated piece on a project. I cut a piece to use and I die-cut a heart and painted it white sanding it up a bit for a worn look. Inspired by Deb Hickman, I used a dress pattern to make my floral focal point. I added a square brad through the layers and glued a fabric button to the top of the brad to dress up the flower.  I die-cut some leaves and added the dress pattern flower to the corrugated heart to complete my focal image.
Finishing touches include two heart stick pins, and a ticket which was stamped creating a sentiment from Inspired by Stamping Little Phrases II.

I am joining along with Our Creative Corner's - Recycle It with a Pop of Green 
I've missed playing in the playground at Pixie's Crafty Snippet Challenge so I am joining in there!!!
The Shabby Tea Room - Summer Cottage
Little Red Wagon - Upcycle (Thanks Jessi)
Catered Crop - No stress to Distress (Thanks Jessi)

I hope you have been inspired to recycle things in your projects!

So excited to share that this card made Top 3 at The Shabby Tea Room Last week! Thank you so much ladies for the shout out! 
Week #128 - Rebecca Deeprose, Tammy, Cathy Mc

Hope you have a great week!
~Tammy~

Tuesday, May 29, 2012

Happy Father's Day : You're Classic

Hi!

Well, it's time to start thinking about Father's Day Cards...and if you have popped by my blog long enough you have heard me talk about the "Dreaded Man Card". Give me, pinks, aquas, ribbon, and bling any day!!! With those pretties, I have no problems whipping up a card, but there in lies the problems "pretties"! I can't very well do that for a guy can I???  

Well, here is what I have for you today!
I started this card with a Vanilla card base, and added a strip of textured patterned paper at the bottom.  I then added a row of tickets which I distressed to give a vintage touch. 
I die-cut a standard circle nestie and stamped the Classic Car from Wilson Designs' American Classics adding the Happy Father's Day sentiment from Wilson Designs' Nauti-Cool. Next I hand-cut a sentiment banner stamping You're Classic to add below the focal image.

Before placing the focal image in the center, I hand-cut a mailing tag out of cork adding my brown grosgrain ribbon on the end. The fun part begins with embellishing with some brown and cream buttons. A star that was cut from an old vintage book print embellished with a brown button in the center. For a finishing touch, another ticket to the upper right side of the buttons was added. 

Thank you for some much needed inspiration at The City Crafter Challenge - Ticket To Ride.  You had to have a mode of transportation and at least one ticket on your card.

Little Red Wagon - Father's Day

Before I go, I thought I would share a few pictures with you from our visit to Arlington National Cemetery yesterday. We arrived while the President was laying his wreaths, but we did not go to the ceremony as they had a stop movement by the Secret Service. 

 A Presidential Wreath

Thank you for letting me share, and I hope you have a wonderful week!
~Tammy~

{Recipe}
Paper: Stampin'  UP!, DP: DCWV, Vintage Book Print
Ink: Versafine: Vintage Sepia, Distress Inks
Other:  Buttons:  Hobby Lobby, Ribbon: Stash, Cork, Dies: Spellbinders, twine