
Hello!
(This is my second post...for my DeNami Designs Product Spotlight Blog Hop Post You can click here.)
I was motivated by a very large bag of plastic Easter Eggs that I have moved around in the bottom of a closet for several years now. It keeps multiplying each year with every egg hunt my son attends. So I guess you can say this is an upcycle project as well! :-) I love to make Home Decor Projects and I love it even better when I can repurpose something! I am sure you may have these stuck in a closet somewhere too.


(This is my second post...for my DeNami Designs Product Spotlight Blog Hop Post You can click here.)
It's my turn to do a tutorial for The Kraft Journal, and I thought I would share an Easter Home Decor Project I worked on.
I was motivated by a very large bag of plastic Easter Eggs that I have moved around in the bottom of a closet for several years now. It keeps multiplying each year with every egg hunt my son attends. So I guess you can say this is an upcycle project as well! :-) I love to make Home Decor Projects and I love it even better when I can repurpose something! I am sure you may have these stuck in a closet somewhere too.
Let's Gather Some Supplies!
The items from The Kraft Outlet
Plastic Easter Eggs
Foam Topiary Tree
Hot Glue Gun
Glue Sticks
Royal Coat / Modge Podge Decoupage Finish
Paint Brush or a Foam Brush
Embellishments for your eggs
(I used)
- Felt
- Buttons
- Paper Flowers
- Patterned Paper
- Lace Trim
Moss
Pot for tree
I am going to first apologize that I didn't have someone to help with pictures.
Here is a picture of some of the supplies needed to get started.

* Prior to starting, cut your Vintage Dictionary Pages into strips at various lengths tearing some of the edges.
With a brush, dab on the Decoupage Finish
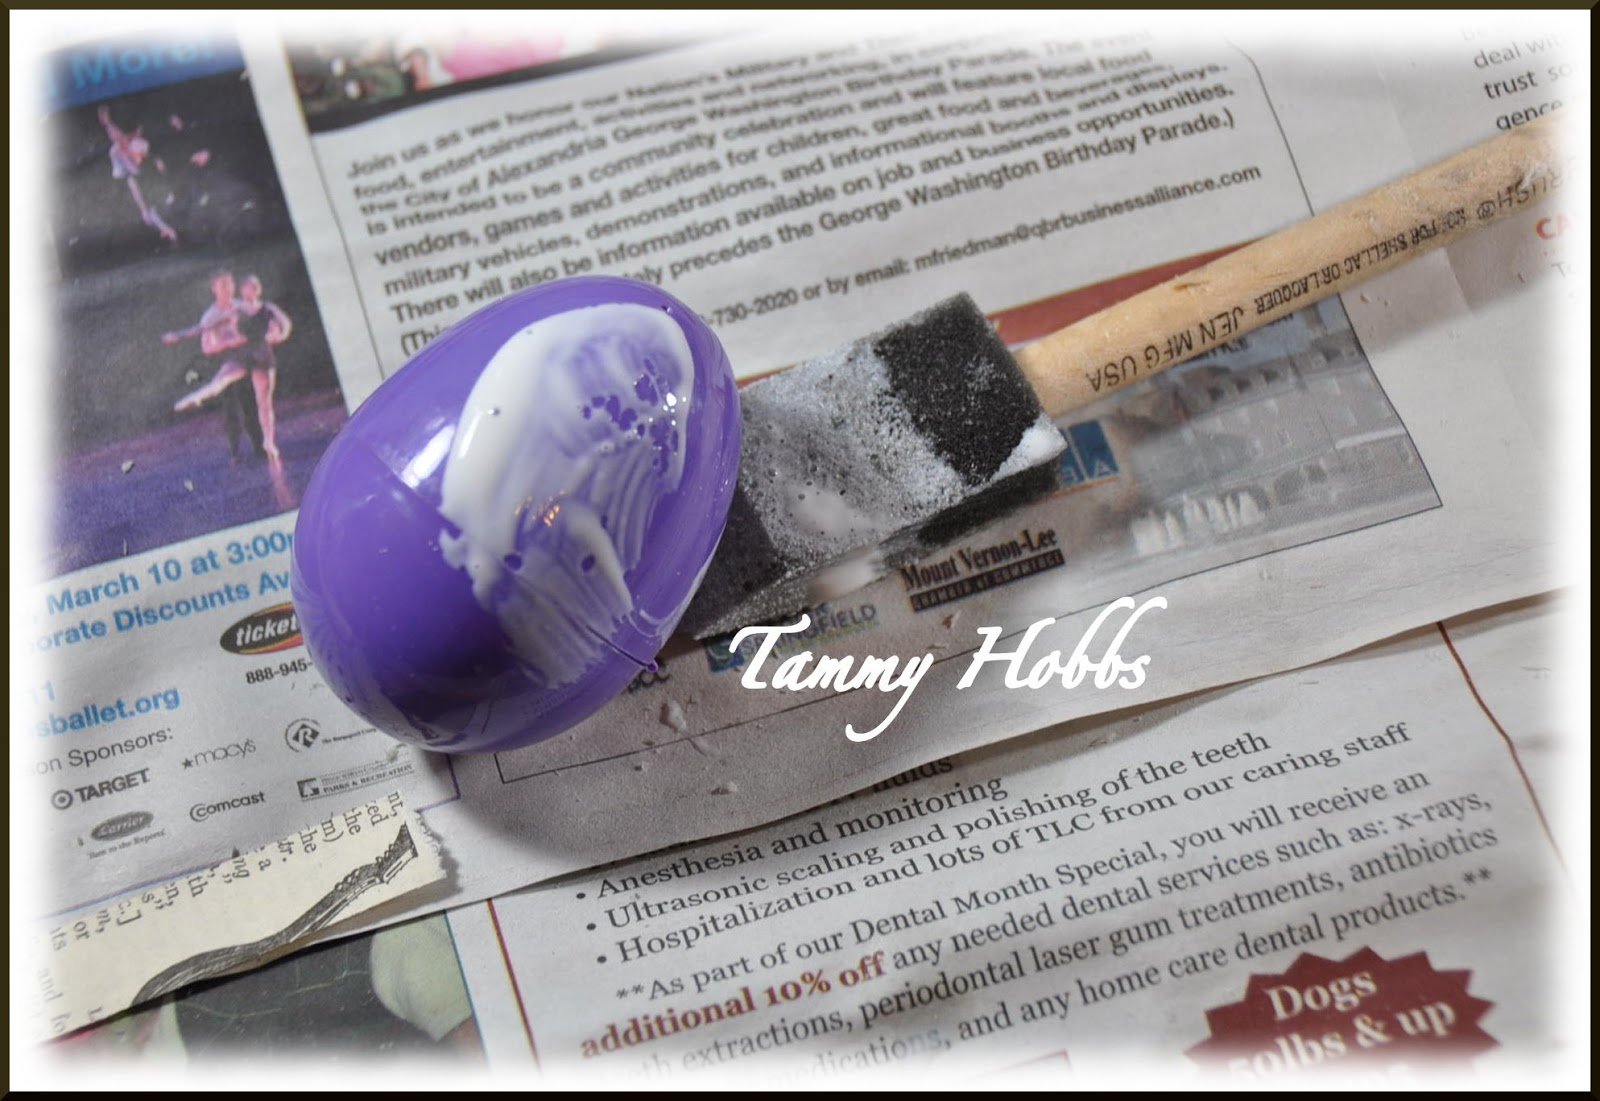
Start working your Vintage Dictionary Pages into different directions smoothing down with your fingers and adding more Decoupage Finish on top as you go. Just channel your inner pre-school self! :-) This is not a project for those who don't like to get messy!!! Trust me the end result is worth it!!!

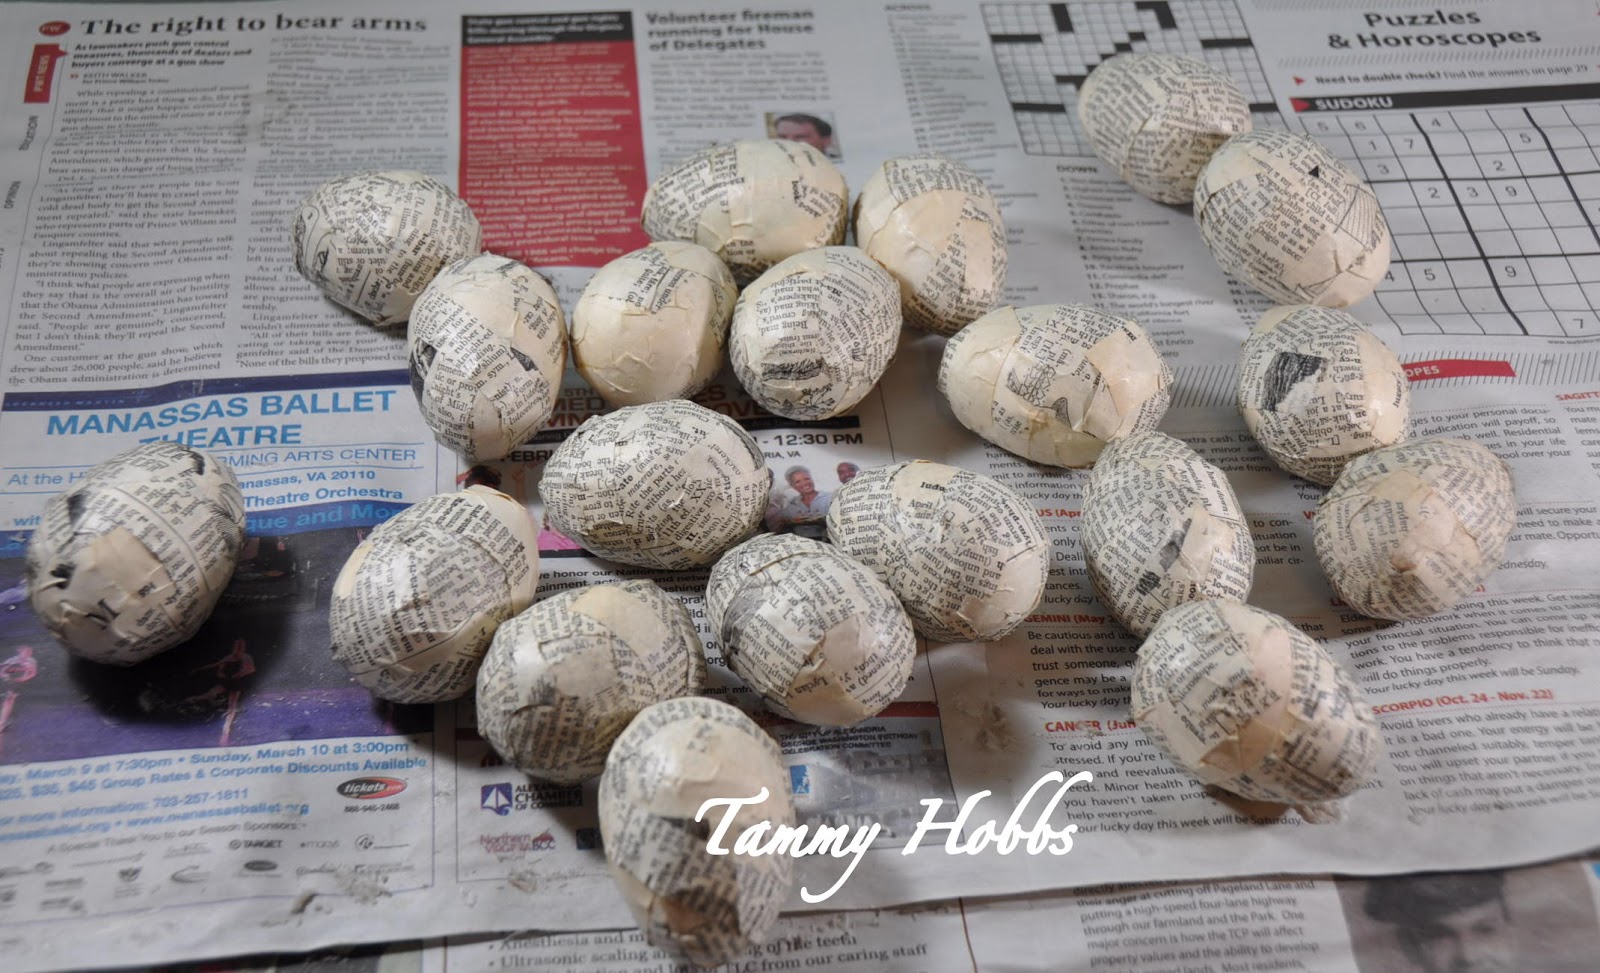
Repeat the process till you cover the amount of eggs needed!
Your Vintage Dictionary Page wrapped eggs! Waiting to be embellished!
Now the fun begins, but I used several items to embellish my eggs. My biggest go to item was the Natural Hemp Cord which I used to make my bows and is so easy to curl. I created a heart border from Lunch Bag Kraft Cardstock. I used Canvas Fringe Ribbon as trim and Burlap to die-cut hearts. All items were adhered to the eggs using a hot glue gun.

Waiting to go onto the tree! :-)

Next, I chose to paint my stem of the topiary!

Using your hot glue gun, apply glue to the back of the egg and add to your tree and hold in place for about a minute.

After all of your eggs have been applied, it's time to add some
moss as filler between your eggs. I also did this by using my hot glue gun.

I chose to use different variations of moss for visual interest.

And The finished, Up-cycled Vintage Topiary Egg Tree!

A close-Up!

I hope you will stop by The Kraft Outlet and pick up some supplies to make your own Vintage Topiary Tree!
I am joining in at Sunday{Fun}day #6 - Linky Party
D.L. Art Thankful Thursday - Linky Party
Shabby Creek Cottage - Transformation Thursday
Let me know what you think! I sure did reduce that bag of eggs!
~Tammy~
**Also, tomorrow is the last day to enter my Birthday Celebration Giveaway! For more chances to Win a shopping spree at Two Fabulous Companies Click here!!!

32 comments:
OMG Tammy this is GORGEOUS!! What a GREAT way to upcycle! Thanks for sharing the step by step and again the finished project is AWESOME!!
wow wow wow!!!!!!!!!!!!!!!!!!!!!!!!!
this is so amazing I can't stand it!! so beautiful!!
Wowwwwwwwwwwwwww! This is AMAZING Tammy! I love love love love it!!!! So pinning this!!! WOW!!
Oh my gosh, this is so cute and you are so crafty and creative. I like the added moss to those adorable eggs. Your little signs of eggs, bunny, and carrot made perfect staging for the photo.
LOVE this Miss Tammy!! It couldn't be any more lovely and springy! You have my address, right??!!?? I bet it looks awesome in your home! BTW - love the wooden blocks and paint color on the wall in the background too :)
oh my word your are amazing girl...this is awesome... so creative and so PRETTY... i love it...thanks for sharing..
Its gorgeous Tammy what a brilliant idea. I always make an Easter Tree! Hugs Susan x
Did you hear that? That was the sound of my jaw hitting the floor. Tammy, your topiary egg tree is out of this world! You are so creative and talented, girl! :-)
Tammy, this is amazing!! Your Easter topiary is gorgeous! It's incredible to see the before/after shots too - so thanks for including them. I never would have guessed that those bright, plastic eggs could be transformed so beautifully!
(And I think your photos are fabulous!)
Holy Cow Tammy! What a delightful Easter project. Your little vintage looking eggs are out of this world!
My jaw hit the floor & all I can say is Wow--incredible project that I love!
HOLY CRAP! (can I swear on blogger comments? lol) Color me flippin amazed at this project Tammy. Seriously. I cannot stop staring with my mouth hanging open. You are BRILLIANT!!!!!
Now that's a great way to get rid of (ahem, I mean) use those dratted plastic eggs!! So cool :)
What a transformation, Tammy! Absolutely stunning!
What a wonderful easter idea : )
WOW WOW Tammy!!!! Awesome and so festive!!!
WOW, Tammy, this is stunning!! What a gorgeous project!! It looks amazing!! Thanks for the tutorial, too...I want to make one now!! Happy Wednesday my friend :)
Lisa
A Mermaid's Crafts
This is simply fabulous! I love that tree! So pretty and you really did a great job!
Gasp! Love! You really are the queen of wonderful tutorials, Tammy. Always a good idea, always well-executed. :)
tammy ~wow~ awesome vintage goodness here!! love it!!!
Wow!!! Would love this little treasure in my house! Such an amazing project you made, Tammy! I absolutely LOVE IT!
Oooooh man Tammy! I think I am gonna fall over!! THis is hands down, AMAZING girl! I love how this turned out...I wish you lived by me...maybe I could sweet talk you to show me in person how to make this amazing and beautiful project!
Love it Tammy!!!!
Sherrie K
Words cannot express how GORGEOUS this is! LOVE it!
What a great project, Tammy! I would never guess those bright plastic eggs are under all that goodness! Thanks for this one!...Nancy :o)
very cool project. I may just do this with some eggs to put in a glass container I have on my buffet. I love the little decorations on the eggs. TFS
WOWZER!!!!!!!! This is awesome Tammy what a great idea thanks for sharing your talent. I love it.
Thank you for joining my DL.ART Thankful Thursday Anything Goes February Linky Party
DIANA L.
http://dianamlarson.blogspot.com
Oh my gosh this is so stinkin' cute Tammy! I love this idea. I just may have to squeeze in some time to make one of these. Thanks so much for sharing this! Hugs!
EEEK! This is SO fabulous, Tammy! SO up my home decor, shabby chic loving alley!
Dang girl! That is awesome! Looks like it could be in a magazine. I love it!!
Stunning project Tammy!
This topiary is stunning! Tammy you amaze me - the patience to do all those eggs... wow!! I would love to have that in my house. It would be perfect on the counter in my entry way.
wow girl! you rocked the topiary! LOVE this sweet, vintage design. beautiful!
Post a Comment